Author: Sam Elegure
Sam is a certified Tableau Desktop Associate. His strong desire for excellence in data visualization and analytics is always brought to bare on his works and trainings.
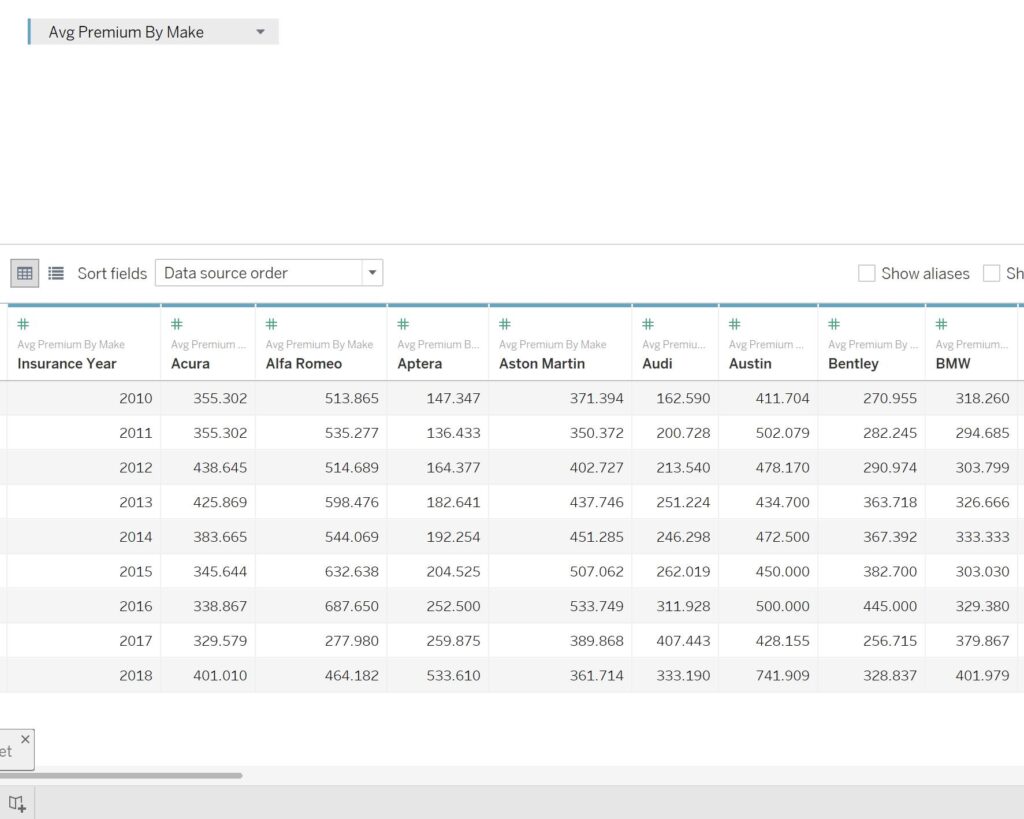
Sometimes you will need to prepare or engineer your data in order to have the data in a desired format. Pivoting the data might be the means to achieve your desired data visualization or analytics goal in a timely and effective manner. In this post we will show the simple three steps to pivot in tableau desktop software.
Step 1:
Drag the desired data source to the data connection window.

Step 2:
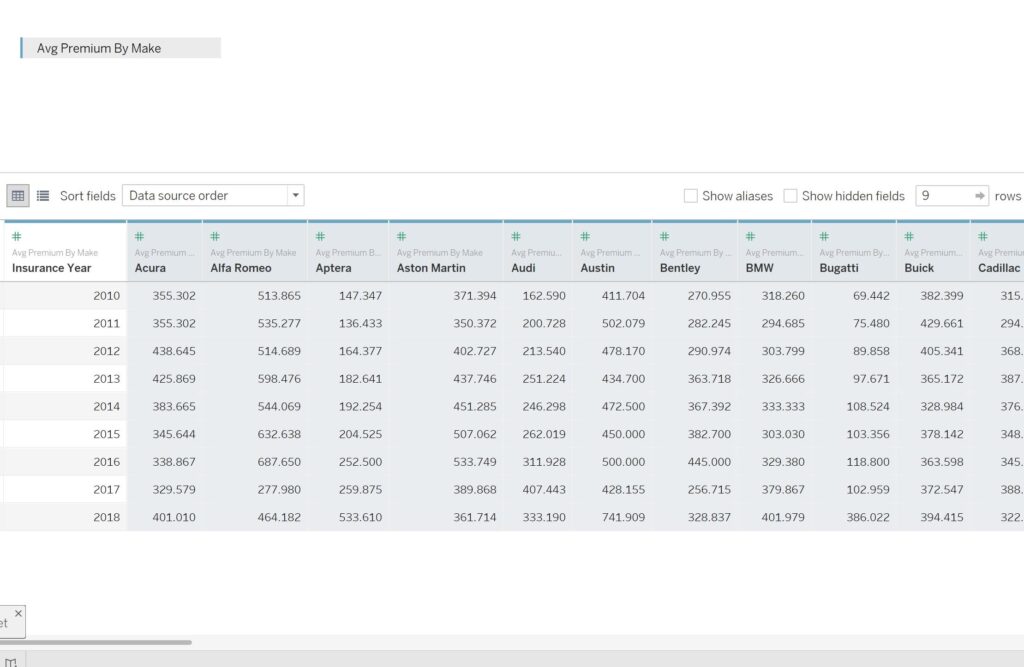
Press the ctrl button and select the desired columns that you will like to pivot

Step 3:
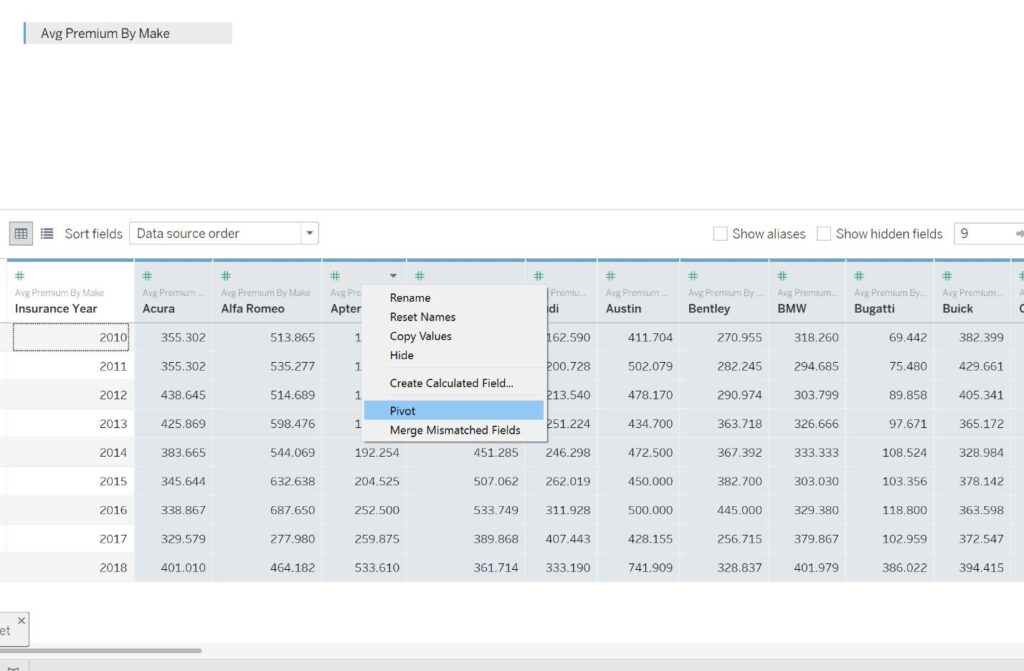
Right click on any of the selected field title and select pivot

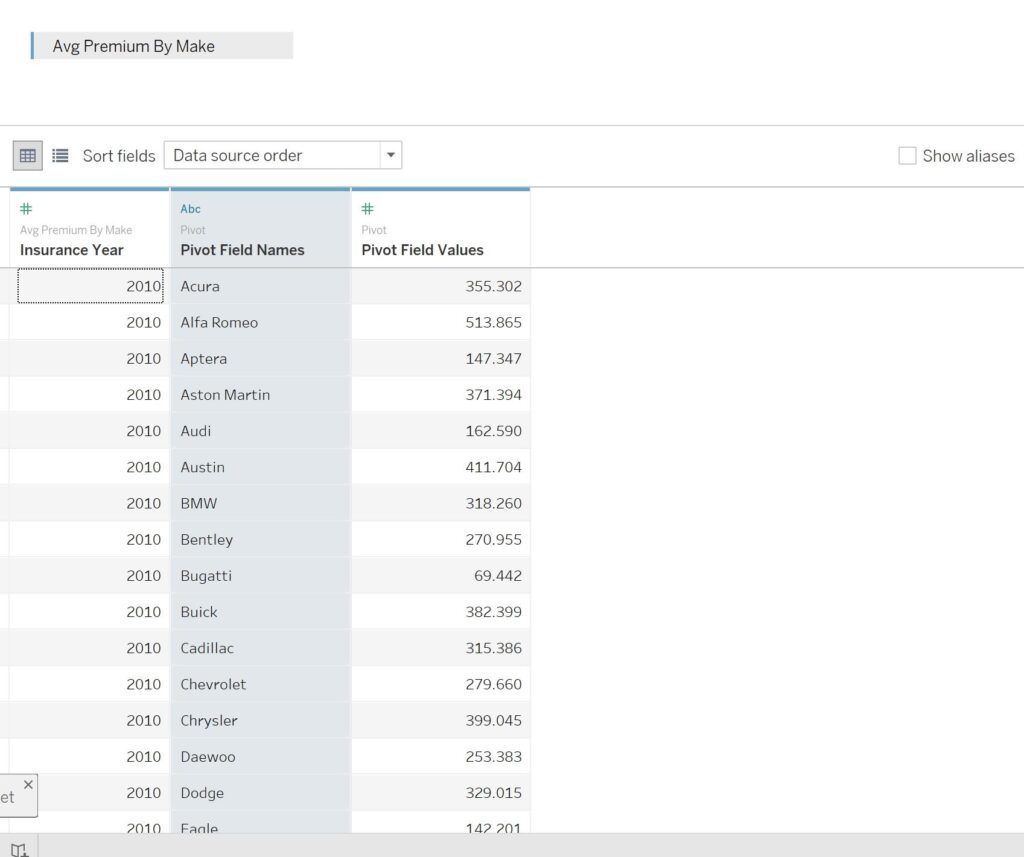
Result

You can rename the field by right clicking on the field title and select Rename.
If you enjoy the post please feel free to subscribe to get more articles like this.
This is the third and final post in a series about toggles in Tableau. For other applications, see the easy way to make a toggle and how to make an integrated toggle switch.
One night at a team happy hour, someone proclaimed, “If we’re going to make a toggle, let’s make America’s best toggle,” and the following user experience was born. By the way, if this sounds like a conversation you wish you were a part of, we’re hiring.
This post shows you how to toggle on a selection from two or more choices with the click of a button. The innovation is that a unique image will be swapped in to highlight the current selection.
How to use button swapping to create a better Tableau toggle
By the end of this post, you will be able to make a field selector that highlights the current selection.
Admittedly, I am taking some liberty with the definition of “toggle” in this example, which is typically thought of as toggling between exactly two features (i.e. a Play / Pause button). I think of the experience outlined in this post as a toggle because you can only toggle one thing on at a time and it’s either the selection or it isn’t (i.e. Boolean). Of course, you can also create this experience for only two options.
To create the selector user experience, we will use a technique called button swapping. Button swapping was developed when set actions existed, but parameter actions did not, so this tutorial will be slightly different. Parameter actions vary from set actions in that (1) something always has to be selected and (2) you cannot do a multi-select; making it a perfect option for a single select “toggle”.
First, create two images for each option: a selected version and an unselected version. For best results, the images should be the exact same dimensions and be created as PNG file types with transparent backgrounds. If you’re able to make the backgrounds transparent, you can place the toggle on a background of any color.